
Yeast Water is simpler than sourdough! YW "kneads' no feeding or discard and is always…


Baking Open Crumb Bread with Wild Yeast Water


NEW! Check out my FAQ’s for baking with Wild Yeast Water!
Here, I’m talking about how to achieve that crusty loaf with a soft crumb, not too damp or sticky, with an open honeycomb structure of holes – or at least more open than you’ve baked before! I’ve been baking my 2.0 recipe with wild yeast water, the sourdough alternative, for a long time. Sometimes the result is, and sometimes it isn’t, as holey as I’d like. Good bread, just not quite the holey crumb I want.
Although most folks rather not bake a doorstop loaf, and there are wonderful dense breads like pumpernickel and whole-grain seedy loaves, there is also eating preference for more open or less open holes in a slice of bread. For example, some folks prefer a tighter crumb, lest the butter and goodies fall through the holes, like my husband prefers!
So, what is this more open crumb method? The idea came to me from Chad Robertson’s latest Bread Book where he boosts his sourdough starter by re-feeding an active starter and letting double again before adding it to the main dough. But as we know, my language is wild yeast water, the no-feed no-discard sourdough alternative! So, I boosted my preferment which is my bread starter.
Bonuses
And guess what, this method also works with 3-day old preferment! That means, if you made an overnight wild yeast water preferment, and decide not to bake the next day, give it a stir and stash it in the fridge. You’ll also get a little tangier flavored bread in exchange for the fridge time. More sourdough-ish. Two bonuses!
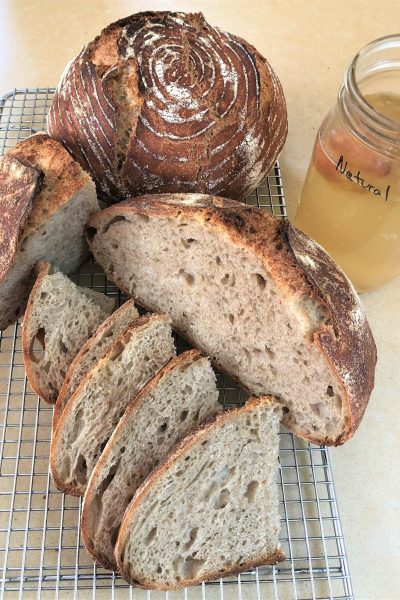
Below are wild yeast water breads baked with a boosted 3-day preferment that turned out pretty fabulous! Seeded rolls too, made with half the dough.


Method for more open crumb
So why does this boost improve the interior crumb? The boost is a second feeding of the yeast water preferment making it stronger with a boost of food before mixing with the main dough. Like giving sourdough starter an additional two or sometimes three feedings after its been refrigerated…..and not knowing when it will be ripe for baking. Ehem, my plug for Wild Yeast Water, which keeps ready-to-use for at least 6+ weeks without additional feedings! And no messy sourdough starter jars or discard. See How to Make Wild Yeast Water.
Boosting Yeast Water Preferment
My boosting method is done by adding additional flour and water to the preferment (essentially a levain or pre-dough) before combining it with the main dough. I use my Yeast Water Artisan 2.0 recipe and boost the preferment after it doubles. It takes about two hours for the boosted mixture to double again at 75-80F, which can be done while the main dough is doing its 2 hour autolyse.
So boosting doesn’t really add additional time, unless you were planning to skip the 2 hour autolyse. And that’s ok by me too. You’ll still have a great loaf of bread made with wild yeast water. These are all the fine details that a bread-baking-geek thinks about. Honestly, just about any way you bake with wild yeast water (within reason) you will have an edible loaf of bread, even if once in a while your loaf is better off as croutons or breadcrumbs. But hopefully that’s a rarity! As I like to quote Ken Forkish from his book Flour Water Salt Yeast:

These are my hardworking baking tools. Measuring ingredients accurately and consistently, and knowing the ambient temperature for proofing is really important. Brod & Taylor is a great resource for tools and recipes.
High-Capacity Scale ——–Folding Proofer ——–Swedish Whisk


Boosted Wild Yeast Water Bread
This formula is an update to my original 2.0 Artisan Bread recipe. Wild Yeast Water Artisan Bread- Simpler Than Sourdough! – Rosemary Mark The recipe is in grams because measurements really do make a difference. I've provided cup measures but I recommend using a scale because cups vary significantly. Remember, you need to make Yeast Water 5-7 days ahead of baking. Once it's made, only a portion is used for this recipe and the remainder keeps refrigerated until ready to bake again. Read here How to Make Wild Yeast Water – Rosemary Mark.
Servings: 2 two lb loaves
Equipment
- Gram scale is preferable to measuring cups High Capacity Baking Scale – Brod & Taylor (brodandtaylor.com)I use this scale for everything
- Brod & Taylor Folding Proofer A proofing device allows control and accuracy. This conveniently folds flat for storage BROD & TAYLOR FOLDING PROOFER (brodandtaylor.com)
- Cast iron or enamel coated cast iron Dutch oven that withstands 500F oven.
- 6 quart cambro bucket or very large bowl
- Digital thermometer
- optional: dough scraper; plastic shower cap
Ingredients
Preferment – make 8-12 hours before mixing Final Dough. This means up to 48 hours before baking.
- 100 grams Yeast Water,(~1/3c plus 1 Tbsp), shake before measuring and heat to 85-90F Instructions for making your first jar of yeast water How to Make Wild Yeast Water – Rosemary Mark
- 100 grams flour, preferably 50g hi-protein bread flour* and 50g any whole wheat or rye flour *such as High Protein Bread Flour // Central Milling Organic High Mountain 13.5% protein
Preferment BOOST – two hours before mixing Final Dough
- 100 grams tap water or filtered water, about 75F
- 100 grams flour, preferably 50g hi protein bread flour* and 50g any whole wheat or rye flour Same as the first preferment
Final Dough – 24 hours before you want to bake the bread
- 600 grams white bread flour (~5-1/2cups + 2Tbsp) all-purpose flour also works, I prefer the slightly more structured crumb texture from higher protein flour
- 200 grams whole wheat flour (~1 cup + 2Tbsp) einkorn or spelt also work well
- 600 grams tap water or filtered water (~2-1/2cups), warmed to about 80F (use 550-575g total water if you prefer working with lower hydration dough. Whole wheat flours also vary in absorption) If boosted preferment took more than 2 hours to double, and your yeast water is more than 6-8 weeks from last refreshing, replace 50-100g of the tap water with yeast water.
- 18-20 grams ~2 Tbsp Kosher salt I prefer Kosher salt for the clean flavor. Use as little as 12 grams or to your preference. Other salts can be used such as gray salt or fleur de sel. Table salt can be used and is 3 tsp per 18grams.
Instructions
- MAKE PREFERMENT 24-48 hours before you want to bake bread.Stir together the 100 grams 85-90F Yeast Water and 100 grams whole wheat flour. The mixture will be thick enough to nearly hold a chopstick straight up for a couple seconds. Let stand at room temperature (65-80F) until at least doubled in volume with a slightly domed top. I do this overnight. A very active water could double in 6-8 hours, but plan on about 12 hours. More or less time depending on room temperature and yeast water strength.Once the preferment doubles, use it or refrigerate for up to two days. Bring to room temperature before proceeding.

- Preferment Boost. Add 100 grams tap water and 100 grams flour to the doubled preferment. Stir well. Cover and let stand at 75-82F until doubled. This should take about 2 hours. Meanwhile, mix main dough and allow to autolyse for 2 hours.

- MAKE MAIN DOUGH 24 hours before planning to bake bread. In a 6-quart container or bowl, stir together the 600g bread flour, 200g whole wheat flour, and 600g water. Stir together until all the dry and wet are just combined. No need to knead!
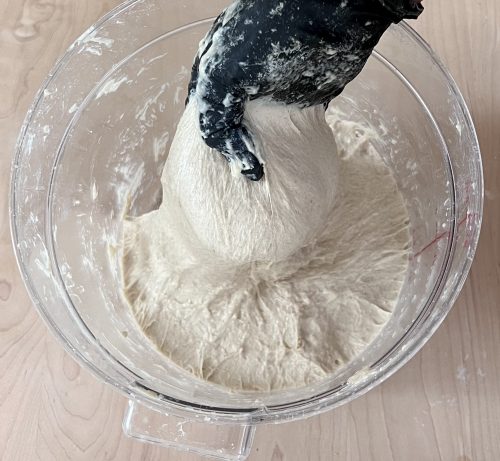
- The main dough and boosted preferment should look like this after 2 hours.
- Combine the boosted preferment and salt with the main dough. Begin mixing by lifting and folding the dough over and scooping up from the bottom of the container. Pinch across the dough making chunks, then refold over itself until all the ingredients are combined. This may take 2-3 minutes.
- Let the dough rest 30 seconds, then do a couple more folds and let it relax into the bowl. Cover the container (plastic shower cap works well) and let stand ideally at 75-82F. If less than 70F, expect the dough to take a lot longer to rise.
- Alternatively: Do slap and folds for about 2 minutes to thoroughly mix and start the gluten development. See my video. Can also be mixed with dough hook in electric mixer on low, about 5 minutes or until dough pulls from sides of bowl.
- FOLDING: Start the series of folds every 30 minutes (the time doesn't have to be exact, even an hour is ok). Here's how to fold: lift an edge of the dough as far as it will go pulling gently, then fold it over itself. Do this 4-6 times around the ball of dough to make a smooth-ish ball.

- The dough tightens with each stretch so the last time it barely stretches up. Cover and let rest again about 30 minutes. Repeat the stretch and fold 3-4 more times at interval of about 30 minutes, during the first 2-3 hours of bulk fermentation.

- BULK FERMENTATION: Leave the container covered and let it do its thing. Time will vary from 4-5 hours up to 8-10 hours depending on ambient temperature and temperature of the dough. I set the container on a cloth, not directly on the cold countertop. Or, in a proof box such as this folding proofer set at 75F. If I need it to go faster because of my schedule, I set it at 78-82F. Up to 85F would be ok. 78-82F is most ideal and usually is ready to divide and shape after 6-7 hours.
- Be patient! Dough should expand to about 1-1/2 to almost 2 times the original volume, depending on temperature. If interior dough temp is 78F let it rise about 50%, if it is 70F let it rise about 75%, or if well below 70F then wait for double in volume. Look for a slightly domed top and some bubbles on the surface; it should be very jiggling and marshmallow-like when ready to divide and shape. Can also use the poke test by coating a finger with flour or water and indenting about 1/2-inch. Look for a slow rise back with the hole slowly enclosing. If it springs back immediately, it needs more time; if it doesn't spring back at all it is over-proofed — if that happens, shape it immediately and bake, or spread into a 9×13-inch greased pan, drizzle with olive oil and bake as focaccia. Another option that sometimes works for over-proofed dough is to gently stretch and fold then allow to rise again. It depends on the strength of the dough at that point.
- This is top-down view of well-proofed dough. Domed with visible bubbles.
- Spritz or dampen work surface with water. Gently scrap the dough out of the container onto the work surface. Using a damp bench scraper, cut the dough in half. See shaping below.
- SHAPING Make 3-4 gentle stretch and folds to shape each piece of dough into a rough ball. I prefer to do this on a slightly damp surface, some bakers use a lightly floured surface. Let rest 20-30 minutes. The dough should expand and bubbles form on surface. Then turn and tuck with hands or one hand and a bench scraper, moving around the ball several times to form a smooth and taught ball. Use little or no flour allowing the dough to create tension on the work surface. The dough will become more taught, and bubbles will form on the surface as the dough is rounded into a ball. Prick any very large bubbles as they tend to burn during baking. See the link in the notes below to Ken Forkish on YouTube for detailed instruction on folding and shaping dough. There are many different techniques!
- FINAL PROOFTurn into lightly floured cloth lined bowl or banneton. Refrigerate uncovered 8-16 hours. I've left refrigerated up to 36 hours, which is ok but seemed to make a slightly more dense crumb.
- Details of hot or cold bake method described here: Hot Bake or Cold Bake – your choice! – Rosemary MarkBAKINGOption #1 Preheated oven, place cast iron or ceramic Dutch oven in cold oven on the highest rack that fits. Heat to 500F conventional or 475F convection (my oven takes 45 minutes). CAREFULLY remove pan from oven and turn lightly flour dusted dough directly from bowl or banneton into the hot pan. Score top (or a slash a smile!) with a lam or sharp knife, then immediately cover and return to oven. Reduce temperature 25 degrees. Bake 25 minutes covered; remove lid and bake additional 15-25 minutes until deep golden brown. NOTE: IF the bottom crust is too dark, next time pre-heat oven to 475F and bake at 450F. Can also try placing the Dutch oven on a baking sheet for insulation. Dutch ovens and your oven can heat differently than the pans I've tested.
- Option #2 Cold start oven, turn dough into unheated Dutch oven lined with lightly floured parchment or silpat. Dough tends to stick in the cold pan if not lined. Place pan in upper third of oven. Turn on to 475F convection or conventional. I find 475F is fine for convection or conventional; with repetition you can choose for your oven and results preference. Bake covered for 50 minutes. Remove lid and bake additional 5-10 minutes until crust is deep golden brown.
- Bake until well browned for the best crust and interior crumb. For extra crisp crust and drier interior crumb, after removing from pan bake on rack additional 5-10 minutes.
- Cool on a wire rack and try not to slice the loaf for at least an hour! Slicing hot bread will compress the interior and change the texture of the crumb.


Notes
How to Make Yeast Water pdf
Ken Forkish YouTube: Shaping the Loaves – Bing video
Link to my Starter Water Baking Demo for the Bakers Dozen of San Francisco
For ready-to-eat in under 24 hours try Overnight No Knead Yeast Water Bread
Bread flour vs all-purpose flour: If you only have all-purpose flour, go ahead and bake with it! Preferably unbleached but bleached will work also, the crumb may be finer with all-purpose vs bread flour.
I like to use Guisto’s Malted Bread Flour which has a small amount of malted barley. Guisto’s description. ‘The addition of malt increases enzymatic activity during fermentation. This yields bread with greater volume without diminishing the integrity of the open crumb. It also increases the depth of color in your crust. This is the best organic malted bread flour for baguettes and sourdough breads of any shape and size. This flour also works very well in laminated doughs and quick doughs.’
When adjusting recipes, keep in mind that whole wheat flour absorbs a little more water than white flour. As little as 15-50 grams more or less water can make a difference. Best to keep notes on type flour and amount of water you use for your preferred results.
Water: Some recipes recommend filtered water. I have used my tap water and also my faucet filtered water, both with success.
These are my favorite tools for successful bread baking.
affiliate link
The high capacity baking scale
I use all day long in my kitchen!

Brod & Taylor Folding Proofer that’s also a slow cooker!

affiliate link
affiliate link
*I AM NOT PAID TO MENTION MY FAVORITE ENAMEL CAST IRON DUTCH OVEN BY AMAZON BASICS BUT I HIGHLY RECOMMEND IT!

Leave a Reply