

Mix this dough at noon and bake tomorrow at noon. Or mix this evening…
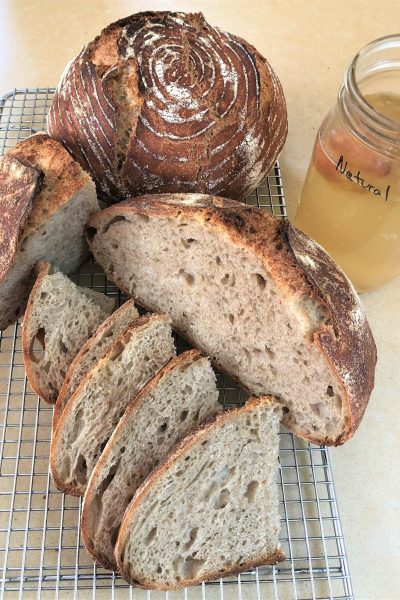


KISS – Overnight Wild Yeast Water Bread

You’ve made a jar of wild yeast water, now let’s KISS – Keep-It-Super-Simple and bake bread!
UPDATE: Instructions for using WYW preferment in this recipe
If you’d like to use this recipe with Wild Yeast Water preferment (preferment instructions here in step 1), it totally works! See notes and photos in the instructions below.
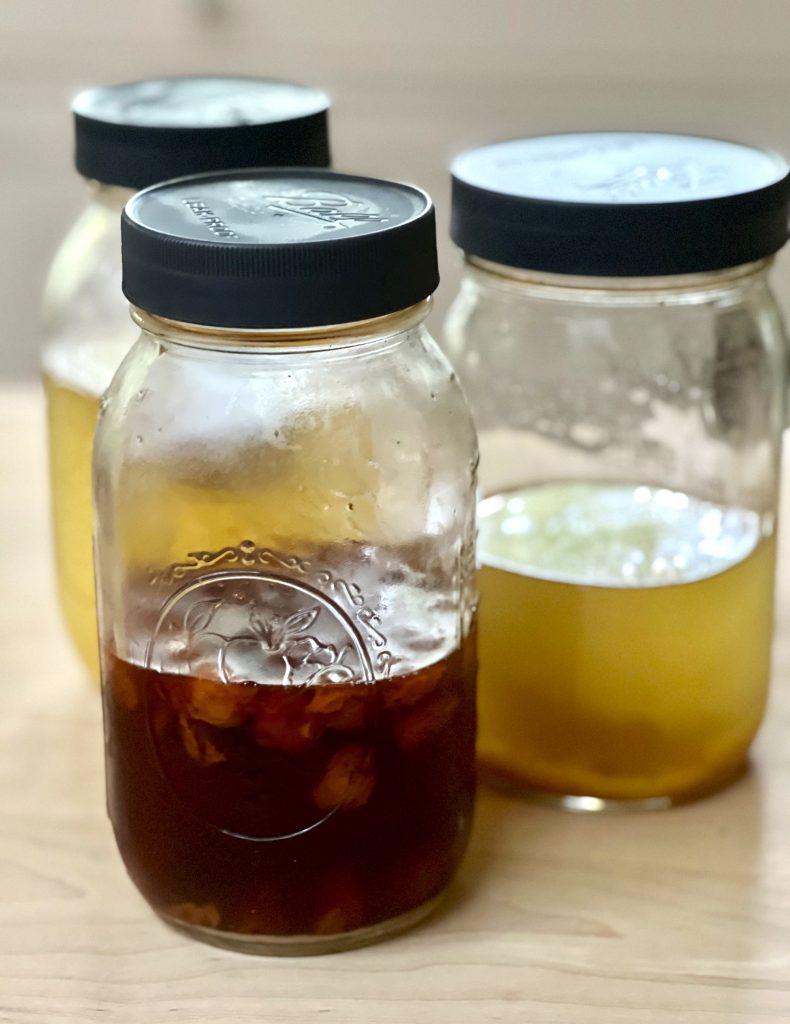
If you happen to be here and not familiar with yeast water, I’m talking about natural yeast in water. Yeast water works like sourdough starter but does not need feeding or discarding to stay active for 2 months or more. I make yeast water with raisins, dried dates, or dried cherries. Flowers, herbs, and many other fresh fruits such as apples, figs, cherries, can also be used to make yeast water.
It takes about a week to ferment your first jar of wild yeast water, then the water (WYW) keeps refrigerated ready to use for a month or more. When you’re ready, the water is ready for this overnight no-knead recipe. No feeding or discarding ‘kneaded’. The process can be zero waste too, by using the spent dates in this Apple Date Snack Cake, or cherries in this One Bowl Almond Cherry Snack Cake.
Click here for how to start your first jar of yeast water. Read more about yeast water in this post, or download Step-by-Step How to Make Yeast Water.
Click here for how to convert sourdough recipes to Wild Yeast Water
For additional YW bread baking detail and recipes, click over to my Overnight No Knead Yeast Water Bread or my Simpler Than Sourdough recipes. See you in the kitchen and please check in with questions and photos of your baking!
These are my favorite and most important tools for successful bread baking.
affiliate link

Click to read more about the Brod & Taylor Folding Proofer that’s also a slow-cooker!

KISS Overnight Wild Yeast Water Bread
This is the simplest way to stir up wild yeast water dough today to bake tomorrow. No 'knead' to feed a starter before baking, just use your water! I recommend weighing all ingredients for best results. This makes a 75% hydration bread: 375g total liquid divided by 500g total flour. See note below about flours and hydration.NOTE: Alternative method using prepared preferment. Either method makes a great over-night loaf. The preferment replaces 100 grams of flour and 100 grams of yeast water. The loaf will have a little longer shelf-life compared to using straight yeast water. Make the preferment with your choice of flour. I usually use 50g hi-protein flour and 50g whole wheat or spelt flour. Stir together the yeast water and flour and let stand at about 75F until double, then add this to the dough with the remaining flour and water. No additional yeast water is needed, as long as the preferment has doubled in 10-12 hours at 75F, there should be plenty of active yeast for the main dough.
Equipment
- gram weight scale I like this scale High Capacity Baking Scale – Brod & Taylor (brodandtaylor.com)
- a warm place to proof dough I highly recommend this proofing box which folds flat for storage Folding Proofer with Accessory Shelf – Brod & Taylor (brodandtaylor.com)
- 1 Dutch oven that can be heated to at least 475F.
- 1 large mixing bowl
- 1 plastic bench scraper or flexible spatula
- 1 piece of parchment paper
Ingredients
- 400 grams bread flour about 3 cups (best to weigh)
- 100 grams whole wheat flour about 3/4 cup – see note below
- 10 grams kosher salt about 1Tbsp, or 2 tsp table salt
- 275 grams tap water about 1-1/4 cup (best to weigh)
- 100 grams wild yeast water, shake before measuring about 7 Tbsp.
Ingredients if using prepared WYW Preferment
- 300 grams bread flour
- 100 grams whole wheat flour
- 10 grams salt
- 275 grams tap water
- 200 grams prepared preferment (100g flour + 100g WYW, mixed, and let double over 8-12hrs. Or, after it has doubled it can be refrigerated up to 48hrs and removed from refrigerator for 2-3hrs.)
Instructions
- Plan on about 20 hours from first mixing until shaping the dough. Once shaped, the dough can be baked immediately or refrigerated about 12 hours. I like to start the dough before 3pm then finish shaping by noon the following day.
- In a large mixing bowl, stir together both flours and the salt.
- Combine the tap water and yeast water (no yeast water here if using preferment) and heat to about 85F (about 30 seconds in microwave). Pour all at once over the flour (add preferment here if using) and stir with a wooden spoon or mix with hands until all the flour is just moistened. Scrape down sides of bowl with a plastic scraper.

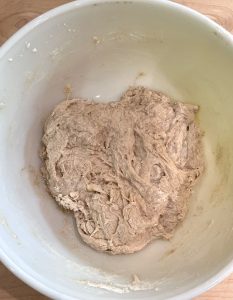
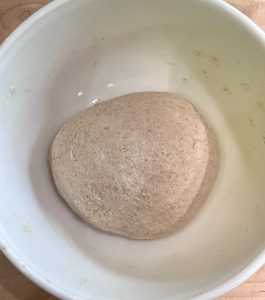
- The dough will look rough when first mixed. This is ok. Cover the bowl with a plate or plastic (shower cap or bowl cover works well) and let stand 15-30 minutes, or up to an hour.

- Now give the dough a slap and fold about 12 times or more until the dough becomes smooth and feels a little taught and easily shapes into a ball. If the dough doesn't smooth out, be sure you are folding completely over the ball of dough, not part way across, before starting the next stretch and fold. See link in the notes below for how to slap 'n fold.If you skip this step you'll still get a great loaf of bread. Slapping helps stretch the gluten and improves the holes which are called the 'crumb'.

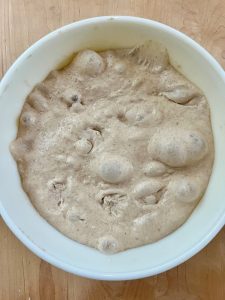
- Cover the bowl again and leave at room temperature, ideally 72-75F, for 12-18 hours. Lower temperature could require 20-24hrs to double. Look for the dough to be at least doubled in volume, smooth on top, and slightly domed with some bubbles around the edges. For consistent proofing temperature, I use the Brod & Taylor Folding Proofer

- The dough might be very bubbly! This was 12 hours at 70F in my proofer box.

- Pre-shaping: Leave the dough in the bowl and gently stir it down with a scraper or spatula, folding over in 90 degree turns several times. Using hands or scraper, firmly push and tuck edges under to shape dough into a ball with a slightly taught surface.

- Cover the bowl and rest dough for 30-60 minutes. The dough should feel soft to the touch and slightly springy with little bubbles forming just under the surface.

- Final shaping: Turn out top side down on a lightly floured work surface. See link in notes below on how to shape. Let rest in flour dusted basket at room temperature up to 2 hours then bake either in a *cold or pre-heated Dutch oven per directions below. Or, refrigerate dough in a flour dusted cloth lined basket or bowl, covered, up to 24 hours before baking (shower cap, plastic bag, or dough cover work well for covering) *See comparison of baking in a cold or a preheated Dutch oven: Hot Bake or Cold Bake — your choice! – Rosemary Mark
- To bake, invert the shaped dough onto a parchment lined plate or tray. Slash top of dough with a lame or sharp knife. Slide into cold or preheated Dutch oven per instructions below.
- COLD BAKE METHOD: These directions are from Elaine Boddy https://foodbodsourdough.com/ to bake from cold start oven. Transfer dough on parchment paper to unheated Dutch oven. Place in cold oven. Set oven to 450°F (425°F convection). Bake covered for 50 minutes. Uncover and bake additional 10 minutes or until well browned. Turn out immediately onto a cooling rack.PREHEAT BAKE METHOD: While dough is resting, preheat a heavy Dutch oven to 500°F (475°F convection). NOTE: The pan must be a glazed pan that can withstand 475-500°F or a cast iron Dutch oven or skillet. Do not place empty pan in preheated oven as it can craze enamel surface. Allow at least 30 minutes for pan and oven to super-heat. My oven takes 45 minutes.Bake 25 minutes covered then uncover and continue to bake about 10 minutes until loaf is well browned. I prefer a very well-browned crust so usually I place the loaf directly on the oven rack to bake additional 5-7 minutes, after the 10 minutes uncovered.
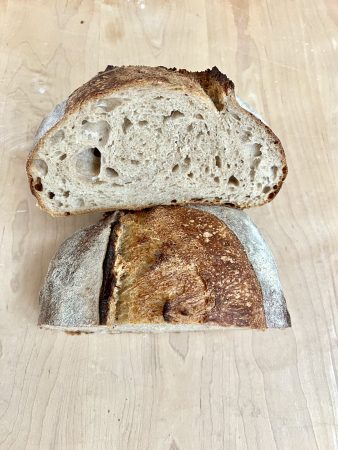
- Wait at least an hour before slicing—-if you can! Slicing hot bread will crush the interior crumb making it gummy.


Notes
Links to videos:
How to Slap ‘n Fold dough
How to Stretch ‘n Fold dough
How to Shape ‘KISS’ Dough
Other tips:
About 5 hours after mixing the dough, you can give it a gentle stretch and fold which helps strengthen the gluten to improve the interior crumb. Do this by lifting the edge of the dough with slightly damp hands, and gently pulling the dough towards the center working equally around the bowl in 4 or 5 stretches. End by turning the dough over in a ball with smooth side up. Cover again and continue with the rise until about double with small bubbles on top. Whole wheat flours vary in water absorption, so if using an ancient grain like Einkorn or Khorasan, it’s possible the dough feels a little wet because those flours absorb a little less water than ‘regular’ whole wheat. For example: Einkorn takes 20 to 30% less hydration, so if you using 20% einkorn, use 6% less water over all to achieve the same hydration, which would be about 22grams less water in this recipe.
About 5 hours after mixing the dough, you can give it a gentle stretch and fold which helps strengthen the gluten to improve the interior crumb. Do this by lifting the edge of the dough with slightly damp hands, and gently pulling the dough towards the center working equally around the bowl in 4 or 5 stretches. End by turning the dough over in a ball with smooth side up. Cover again and continue with the rise until about double with small bubbles on top. Whole wheat flours vary in water absorption, so if using an ancient grain like Einkorn or Khorasan, it’s possible the dough feels a little wet because those flours absorb a little less water than ‘regular’ whole wheat. For example: Einkorn takes 20 to 30% less hydration, so if you using 20% einkorn, use 6% less water over all to achieve the same hydration, which would be about 22grams less water in this recipe.
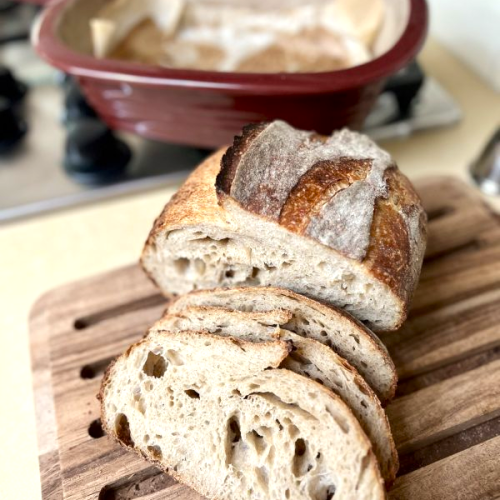
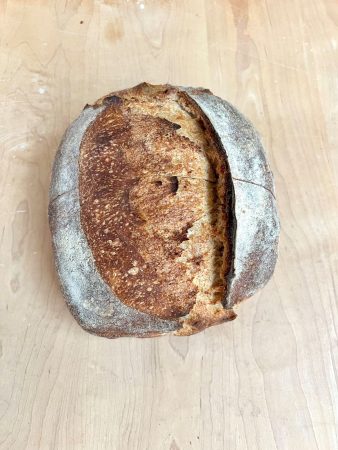
KISS made with Preferment per recipe above.

Interesting. I’m not a bread baker, but do make breakfast muffins this time of year. Happy Thanksgiving!
I am an avid bread baker but sourdough has alluded me. I can’t wait to try this method of making sourdough, Rosemary makes this so simple, I don’t think I can mess it up.
This is THE way to make long-rise breads if you have tired of feeding sourdough starter. The long fermentation makes a subtle flavor difference that is so good. Plus the breads keep fresh longer than active dry yeast breads.
Hi, I’ve been making SD bread, but like many others I’ve become tired of all the feeding! Can’t wait to make this, but I have to eat gluten free and was wondering if you can tell me how to replace the flour with Einkorn WW and/or AP flour?
Also, microwaving the WY water (if even only to temp of 85) doesn’t kill the live yeast?
Thank You!!
Sandy – Einkorn can replace the whole wheat flour. I think you might be asking about replacing the AP flour with gluten free flour? I have never tried that. Since I do not bake gluten free artisan bread, I recommend looking at the website http://www.letthemeatglutenfreecake.com I have successfully made her sourdough starter with gluten free flours and wild yeast water, then followed her formula for gluten free bread. There are photos in my Instagram highlights. I hope that helps. As for heating the yeast water, as long as it stays below 90F it will be fine. Over 95F most likely will kill the yeast cells.