

Wood fired, grilled, or baked, Yeast Water pizza dough is a success! I'm continuing my…


Yeast Water Dough Sticky Buns!


– Follow my blog with Bloglovin
What is a good temperature for bread dough rising? Warm summer weather! I found dough rising nirvana in Elgin, Arizona where my daughter Erika lives. It was perfect for testing sweet rolls with my yeast water dough.
Click here for directions on how to start your first jar of yeast water,
or download Step-by-Step How to Make Yeast Water.
Erika’s house is an adobe straw bale construction, with 18-inch thick walls that hold steady summer indoor temps of 70-80F. Just right for dough rising. The house can cool well below 70F at night, so to speed up the rising I sometimes brought the dough outdoors for a few hours where it was warmer. Here’s a 15 second video of my dough rising and the finished rolls at Erika’s house.
Of course because of the summer heat, I scheduled to bake early in the day. That’s easy to plan because the finished dough waits patiently in the refrigerator overnight, or rises all night and is ready to bake in the morning. My recipe below gives options for scheduling.
This sticky bun dough was a test of adding honey to my basic Artisan Bread Dough. Just 50 grams of honey was good for my taste. Since I was ‘on a roll’ testing the recipe, I also tried omitting the honey — to double test (haha!). Every last one of the buns made with or without extra honey was enjoyed by us and a few neighbors down Erika’s country road. And now writing this I had my last bite of the last bun — time to bake again!
If you have or haven’t been on the artisan bread band wagon yet, I’m pretty sure these homemade sticky buns will get you rolling! Let me know if you try them and shoot me any questions along the way. I love to see pictures of your bakes.
affiliate link
click to read about the high capacity baking scale
I use all day long in my kitchen!

click to see more about the Brod & Taylor Folding Proofer and it’s a slow-cooker too!

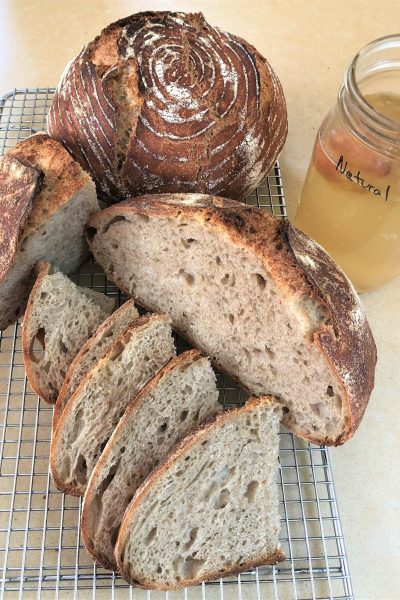
Raisin Date Yeast Water Samples
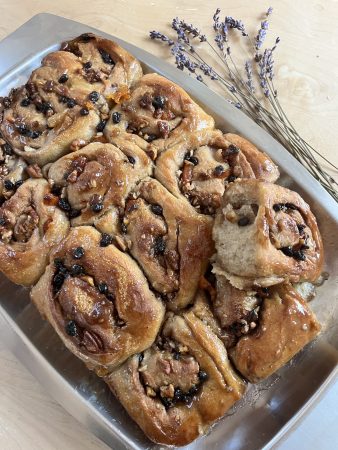

Yeast Water Dough Sticky Buns
Yeast water raised dough is a long-rise dough that allows flexibility in timing. Once the dough is proofed and filled, the rolls can be baked in a couple hours or wait in the refrigerator overnight before baking. Just plan the timing for straight-from-the-oven sticky buns for breakfast!SAMPLE SCHEDULE #1 – Start dough the day before baking. Shape and bake rolls the following morning.The day before baking: Make Preferment early in the morning if room temp is at least 75F, so it can double in 12 hours. If you aren't sure it will be warm enough to double in 12 hours, make it 24-48 hours ahead. I've refrigerated preferment for up to 72 hours and it works fine.5-6pm before the baking day: Make final dough with the doubled preferment. Let final dough rise all night (8-12hrs) or until at least doubled in volume.7am on baking day: Roll, fill and cut dough. Place rolls in baking dish. Let rise about 2 hours, at room temp; bake at 9 or 10am.SAMPLE SCHEDULE #2 – Start 2 days before baking. Shape and refrig night before. Bake in morning.Two evenings before baking: Make preferment allowing at least 12 hours for it to double in volume.7am day before baking: Make final dough with the preferment. Let final dough rise all day (8-12hrs) or until at least doubled in volume.7pm night before baking: Roll, fill and cut dough. Place rolls in baking dish and refrigerate overnight. 7am: Bake!
Servings: 12 buns
Equipment
- large bowl for dough mixing and rising
- 9×13-inch baking dish, glass or metal
- Digital thermometer
- Gram scale is preferable to measuring cups If cup measuring, fluff the flour then spoon into cup and level with a knife. I use 120g flour/cup.
- Folding Proof Box to control temperature
Ingredients
Preferment – 100g each YW and flour also works in recipe as written
- 50 grams Yeast Water, shake before measuring and heat to 90-95F (about 3 Tbsp) see link to Yeast Water prep at top of post
- 50 grams whole wheat flour (about 1/3 cup)
Final Dough
- 400 grams all-purpose flour or bread flour (about 3 cups) the dough will be softer with AP flour
- 50 grams whole wheat flour (about 1/3 cup)
- 250 grams tap water or filtered water (about 7/8 cup)
- 75 grams Yeast Water, shake before measuring (about 1/3 cup)
- 50 grams honey (about 2-1/2 Tbsp)
- 9 grams salt (about 2-1/2 tsp Kosher salt or 1-1/2tsp table salt)
Sticky Bun Sugar Filling
- 1/2 cup (113g) butter, divided use
- 1 cup (120g) brown coconut sugar or 3/4 cup (165g) packed brown sugar
- 1/4 cup (85g) honey
- 2 tsp. cinnamon
- 3/4 cup (100g) chopped walnuts or pecans, optional
- 1/2 cup (80g) dried currants or raisins, optional
Instructions
- Make the preferment 48 hours before baking: Stir together the 50grams 90-95F yeast water and 50grams whole wheat flour*. Let stand at room temperature at least 12 hours or up to 24 until doubled. It can be refrigerated 24-48 hours and used later, if you decide you aren't ready to bake. Bring to room temp before proceeding. *or 100g each and follow recipe as written.
- Make final dough up to 24 hours before baking: In a 3-4 quart container or bowl, stir together the flours. Combine the tap water (or filtered water), yeast water , and honey in a bowl or 4-cup measure. Heat to 90-95F (in my microwave this takes 30-60 seconds).
- Stir together the flours and warmed yeast water-honey mixture until all the dry and wet are just combined. No need to knead! Let stand 20-30 minutes. This is the autolyse stage which hydrates the flour and starts to activate the enzymes and the gluten forming proteins, improving the dough's ability to stretch and hold it's shape
- Now pour the preferment and the salt over the dough. Begin the mixing by lifting and folding the dough over and scooping up from the bottom of the container. Then pinch across the dough making chunks, then refold over itself until all the ingredients are combined. This can take 2-3 minutes.
- Let the dough rest 15- 30 seconds, then do a couple more folds and let it relax into the bowl. Cover the container (plastic shower cap works well) and let stand at room temperature 30 minutes.
- FOLDING: Now start the series of three folds every 30 minutes (the time doesn't have to be exact, even an hour between folds is ok). How to fold: lift an edge of the dough as far as it will go pulling gently, then fold it over itself. Do this 3 more times moving around the bowl.You'll notice the dough tightens with each stretch so the last time it barely stretches up. Cover with plastic and let rest again about 30 minutes. Repeat the folding session for total of 3 times which will take about 2 hours. Don't stress if you let it go longer, just not more than 3 hours.
- BULK FERMENTATION: Keep the dough covered with plastic (the dough tends to dry if covered with a towel), and let it do it's thing for about 10 hours. I set the bowl on a cloth so it is not directly on the cold countertop.
- Be patient! It takes 9-12 hours after the final fold to at least double (called bulk fermentation). This can take longer if room temperature is lower than 72F, or faster if above 75F. Dough should be 2-1/2 to 3 times the original volume. Look for a slightly domed top and some bubbles on the surface.
- When dough is at least doubled, it's time to fill with the sugar filling. At this point it will be ready to bake in an hour or two, or it can be refrigerated overnight.
- On a lightly floured surface or on a silpat, flatten the dough with hands or rolling pin to approximately 16X14-inch rectangle. Allow to rest a few minutes and continue stretching if needed.

- Generously butter the baking dish with 2 tablespoons of the butter. Lightly warm remaining butter with the coconut sugar (or brown sugar), honey and cinnamon. Spread over dough to within 1/2-inch of edges. Top evenly with currants and nuts if desired.
- Roll up the dough starting on a long edge. Cut into 12 even slices, a little over 1-inch wide. If dough is on a sillpat, use a plastic bench scraper or carefully cut with a table knife to avoid cutting the silpat.
- Arrange rolls in the buttered baking dish.
- Cover with plastic wrap and refrigerate overnight, or let rise in a warm place (72-78F) about 1 hour, until dough is slightly puffy.
- Bake at 375F for about 30 minutes. (If refrigerated overnight, let stand at room temp while preheating oven, add 5-10 minutes to bake time if dough starts cold). Rolls are done when very lightly browned on top and the sticky-gooey is bubbly and deep golden color under the rolls. Remove from oven and let stand 2 minutes. Invert onto a tray or silpat, or remove rolls individually with a wide spatula, scraping up the sticky-gooey for each roll. Most delightful served warm, delectable cool too. Can reheat lightly in toaster oven or very briefly in microwave.


Have you been eavesdropping? I’ve finally been successful keeping a WYW starter going for months now by using your schedule for feedings when needed. So far great success with no failures. I’ve been switching as many of my breads as possible to WYW and just yesterday, while driving, I said to my wife, we’ve not had “Sticky Buns” in quite awhile.
This is on today’s schedule.
Thanks.
You made my day Craig! Glad to hear how well your WYW is working. Happy to hear from you and hope you love the sticky buns!